Five Guys isn’t the only place that can make decent fries…
Like everything in life, moderation is key. Should you be eating french fries at every meal? Probably not. Once in a while? Sounds good to me. It’s pretty hard to argue about the simple ingredients — vegetable oil, potatoes, and salt. Many recipes call for a deep fryer, but here we’ll use a chicken frying pan. Let’s get started…
Homemade Handcut Fries
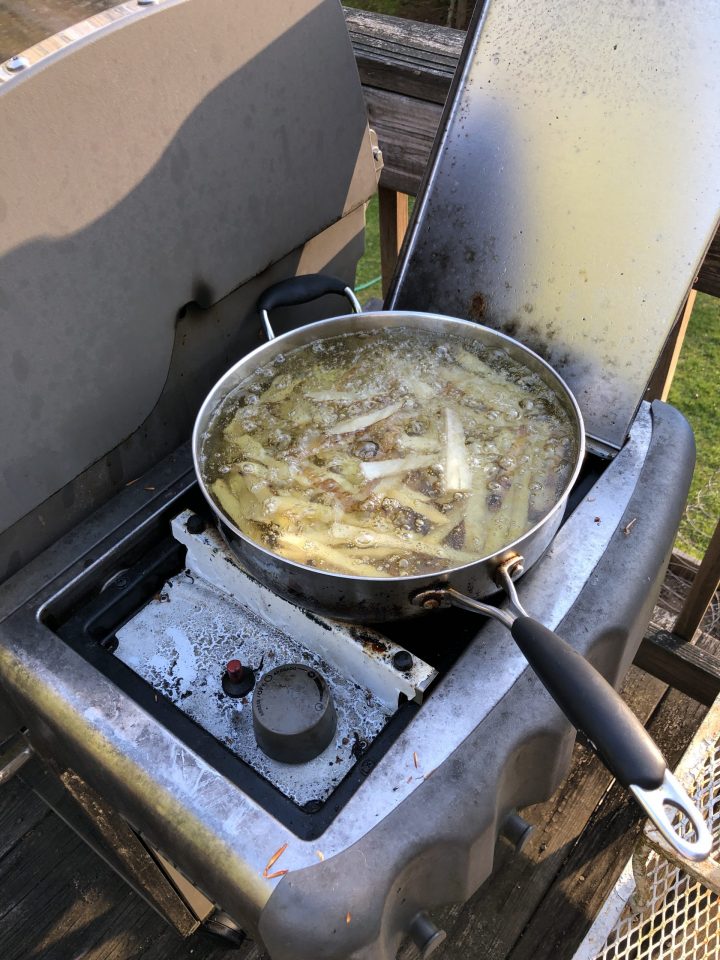
3 simple ingredients combine to deliver these beauties piping hot to your piehole. I like to use the outside grill side burner for making fries so the house does not smell like a fryolator–it takes longer but I can prepare accompanying dishes as I make them.
Print
Pin
Rate
Equipment
- Large chicken fryer pan
- Metal slotted spoon
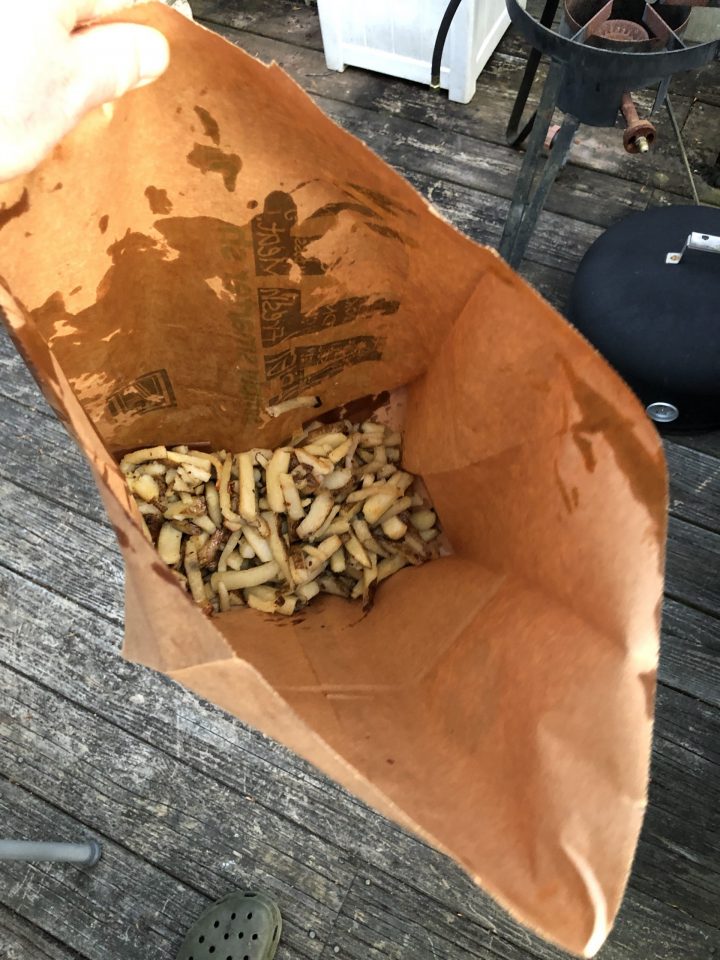
- Brown paper shopping bag
Ingredients
- 6-8 Large potatoes, preferrably russet (use more, depending on size)
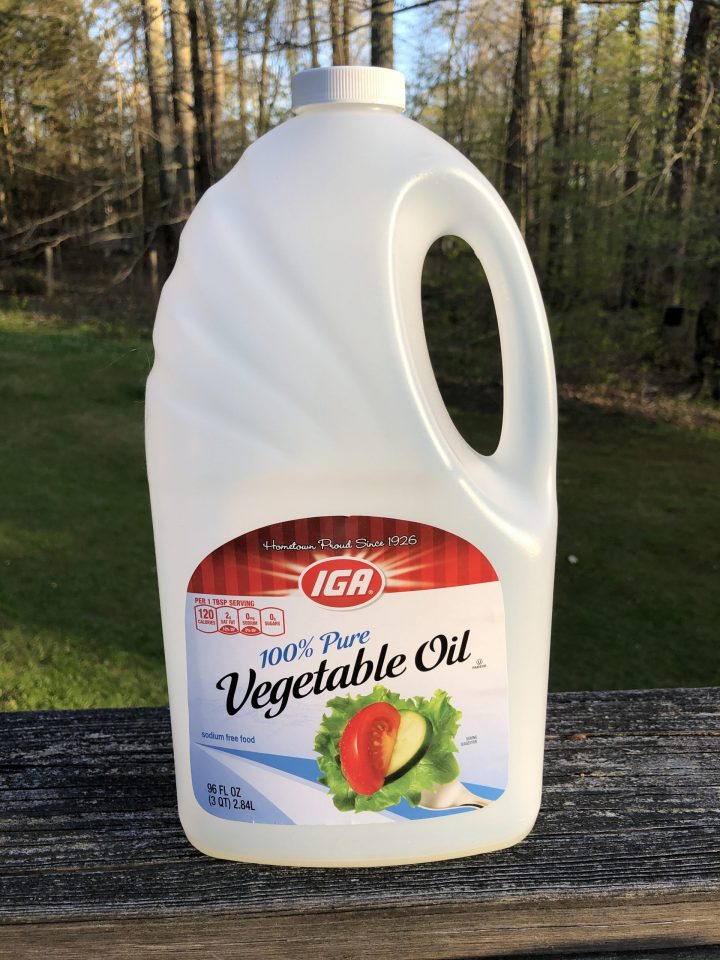
- 3 quarts Vegetable Oil (do NOT use Olive Oil, as it has a low smoking point)
- 2 tbsp salt, preferrably kosher or coarsely ground
Instructions
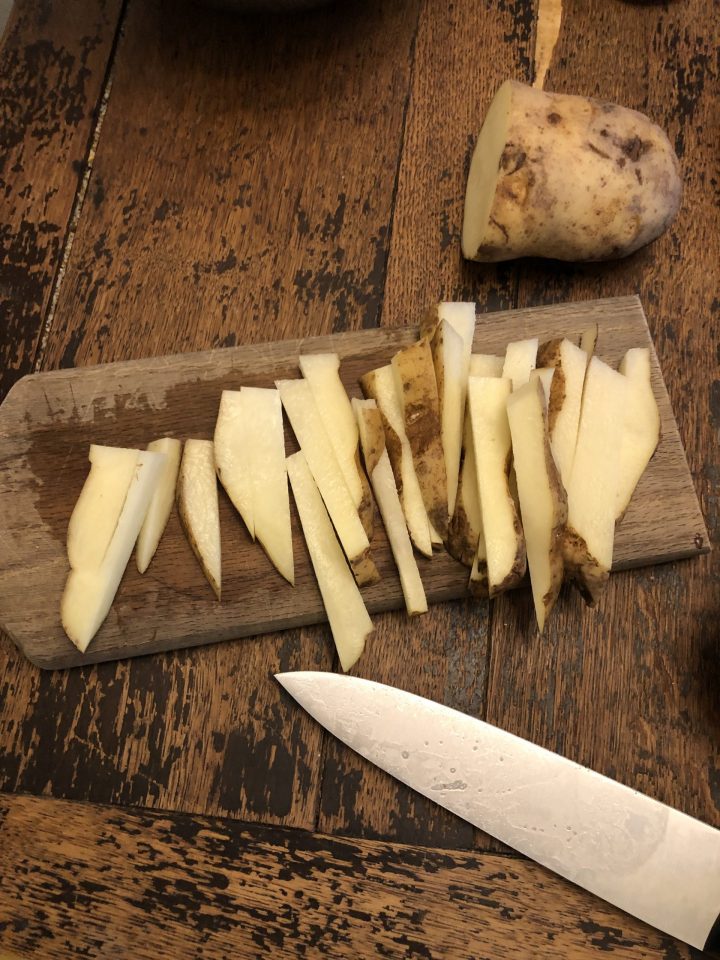
- If you have a french-fry cutter, go ahead and use it. Ours broke a while back, and I haven't replaced it. Instead, I cut the potatoes by hand. Start by washing a potato under cold water and gently rubbing it dry with a dish towel.
- Dump all of the vegetable oil into the chicken frying pan. Don't worry, you can strain it and reuse a few times. Place on high heat and let preheat.

- Prepare your fries. Start by slicing the potato length-wise in half with a large, sturdy knife. Take the half potato and continue slicing it in halves lengthwise until you have the desired thickness of your fry. Take these halves and stack them on each other flat, then cut these into strips lengthwise. As you can see, they don;t need to be perfect. Just keep slicing lengthwise until you have what resembles a hearty handcut fry. If you prefer shoestring fries–keep slicing. The smaller the fry, the faster it will cook. Place the sliced potatoes into a bowl.
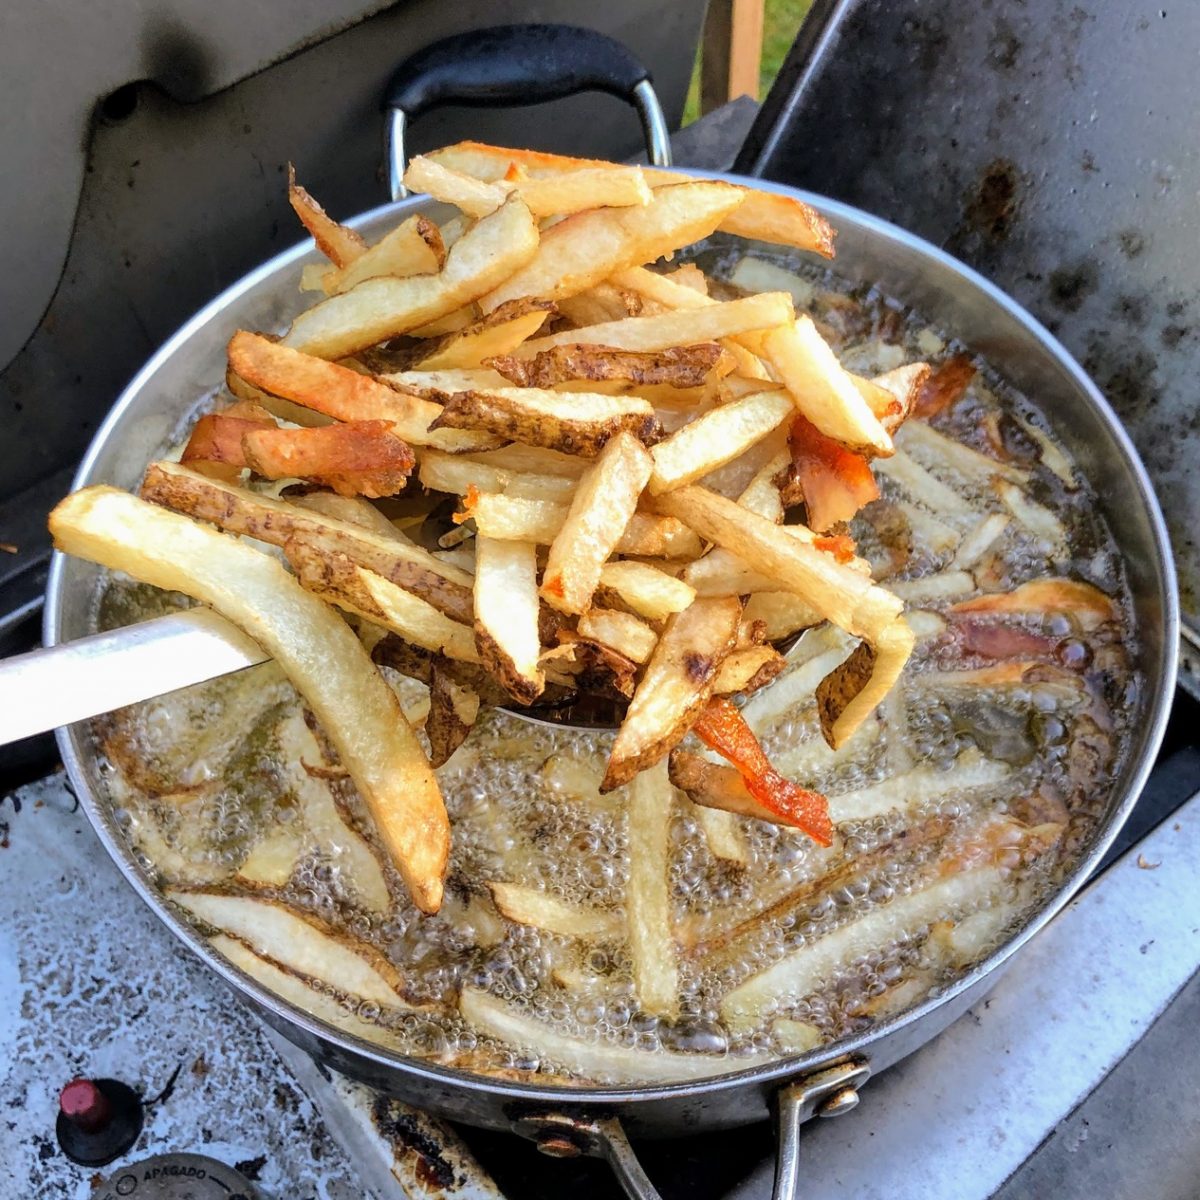
- When you have a decent pile of fries, get ready to lower them into the hot oil. You can tell the oil is hot enough when you start seeing waves of translucent swirls within the oil. A simple test is to carefully drop one fry into the oil and listen for a bubbling, frying sound. If no bubble or sound, just give the oil a little longer to heat up. If the sound is good and solid, continue carefully lowering handfuls of the slices into the oil. Please do this carefully and attentively to avoid burns. Leave these to cook for 5-10 minutes.
- Once the fries start turning slightly brown, give them a stir with a fork or the metal slotted ladle. Please also perform this step carefully. Give the fries another 5-10 minutes.
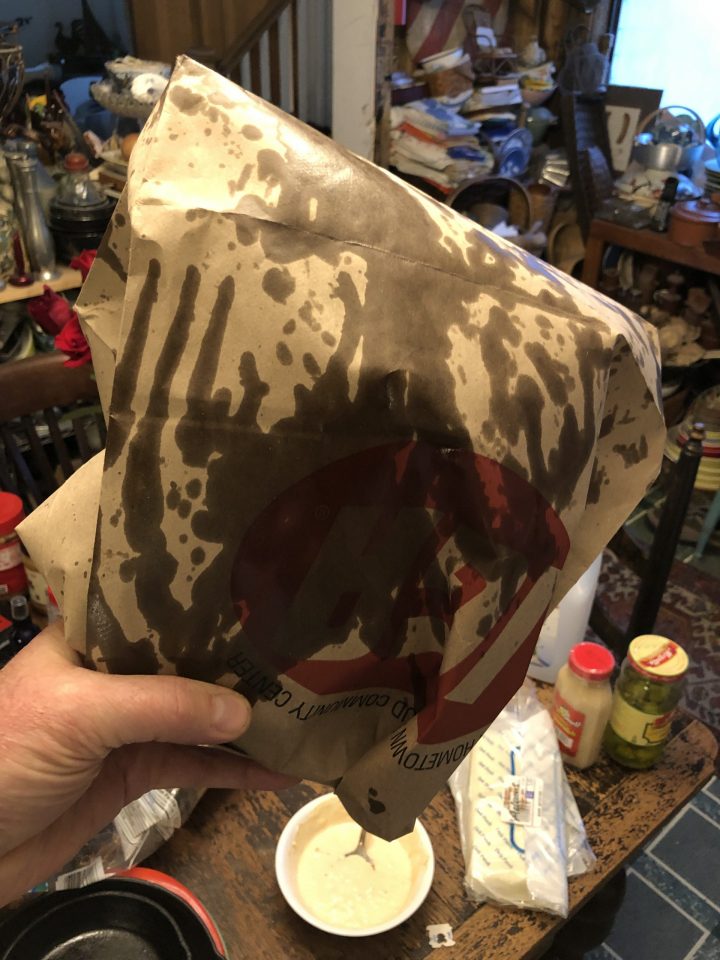
- Once you notice the fries evenly browned to a tannish, golden-brown hue, take one out with the slotted ladle for a taste test. This is where the subjective part comes in to play. Some prefer them crispy and dark, while others like them a little softer. I like them somewhere in between. Start removing from the fryer pan in batches with the ladle. Hold them over the pan to drain excess oil, moving the ladle up and down to assist in the process. Dump into the paper shopping bag, sliding them down the sides to capture the excess oil.
- Toss in a tablespoon of salt and shake vigorously. This is the fun part. The sound, feel, and smell of those hot fries bouncing around in the shopping bag is a sign that dinner is almost ready. The bag will turn quite greasy as you do this, so you might even want a second bag on-hand for the next batch.
- I usually go for two rounds and eyeball the amount of potatoes I use, so expect about 10-15 minutes cooking time per batch of fries, depending on your burner size. It takes longer cooking these on grill sideburner, but as I am multitasking for the meal, I don't mind. I usually roll up the bag and flip upside down to let the fries cool off and slightly 'steam' while I continue preparing the meal. This step is CRUCIAL, in my opinion, as it slightly softens the fries, imbuing them with the taste of the clamshack fries I enjoyed as a kid.
- Last step – devour! The sog, crispiness, and chewiness of these fries lets them stand on their own, but you are of course, welcome to dab them with a little ketchup, and a dash malt vinegar is ALWAYS permitted.