When I started writing this recipe up, I thought about what to name the article and recipe. Calling it ‘Texas-Style’ might be too much of a blanket statement. I mean, Texas is a BIG state, and there are so many great BBQ places around the state. Furthermore, there are many ways and styles of preparing brisket and barbecue–Kansas City, wet rubs, dry rubs, ‘Texas Crutch,’ and so on. BBQ is a religion to many. I have watched enough cooking shows and read enough articles to make my head spin, but I feel like I am treading on sacred ground trying to even attempt a brisket recipe. On the other hand, I have smoked, eaten, and absolutely ruined enough briskets to know how I like my smoked brisket to taste. Fortunately enough, one of my previous gigs required me to travel to Austin, TX quite a bit, so I feel like I have enough exposure to good brisket to compare. Finally, my brother in law Chuck, who lives in Texas, was the one who first introduced our family to brisket, and he is an AMAZING chef.
The Backstory
I had never had brisket until I tried Chuck’s–and man it is good. It seemed so mysterious how you put this cheap hunk of meat into a smoker very early in the morning and by mid afternoon, you had this euphoric meal that tasted unlike any cut of meat on earth. He would come up from Texas and carry up the meat with him on the plane. This guy can cook up huge quantities of the meaty gold for the extended family without blinking an eye–he knows his stuff. He inspired me years ago to go out and buy a cheap vertical smoker from the local home improvement store. I laugh thinking about my first disastrous experiences with brisket. ‘Yeah! Gimme some smoke. I’m going to stuff this thing full of hickory and get the smokiest flavor I can. Just LOOK at the smoke pouring out of it–can’t wait to taste it.’ I finally knew what creosote from the inside of a chimney tasted like, with my family and I looking at each other in horror.
Fast forward to today. After having ruined another brisket after that first one years ago, I sat down and did some SERIOUS research, and started experimenting with various methods of smoking brisket. Some folks prefer a ‘dry rub’, where a dried mixture is rubbed onto the meat, and there is the ‘wet rub’, where, as the name implies, you rub sauce into the meat before smoking. With many things in life, I like the best of all worlds, so I do both. I also was amazed by the sheer number of smoking woods you could use. I tried pecan, cherry, allspice–you name it. Through trial and error, I found that the combination of apple, hickory, and white oak created a heavenly flavor that my family loved. Finally, I got tired of going out and adding more charcoal to the smoker to keep it going throughout the day, so stumbled across ‘the Minion method’ of using unlit charcoal to keep the heat on all day. What follows is an easy to follow method combining much of what has worked for me so you don’t have to throw out your first brisket. Even if you are a seasoned pit master, I encourage to give these combos a shot.
The summary
Okay Liam, quit yapping and tell me the details. If you don’t want to read through everything, here is a high-level summary of tips and overview of the process, which is easy to break down.
- Prep the smoker, coals, and water bowl in the smoker (Minion Method)
- Do the dry/wet rub on the brisket
- Plan on ballpark 80-90 minutes a pound, so I generally estimate 6 hours for a 4-5 lb brisket.
- Check it in about 4 hours for temp (around 155-160 degrees) and wrap it to increase the temps (The Texas Crutch)
- Check temps at around the 5 hour mark.
- Pull the brisket at around 195 degrees
What you need
The smoker
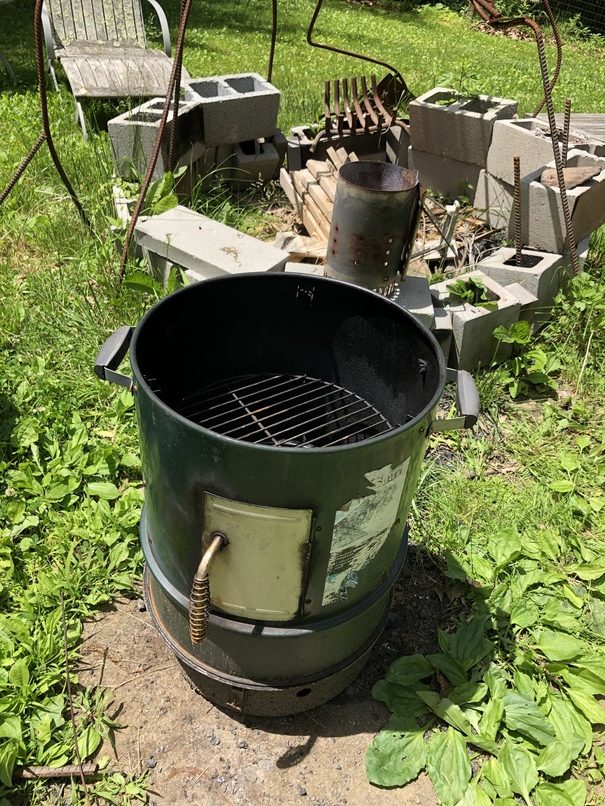
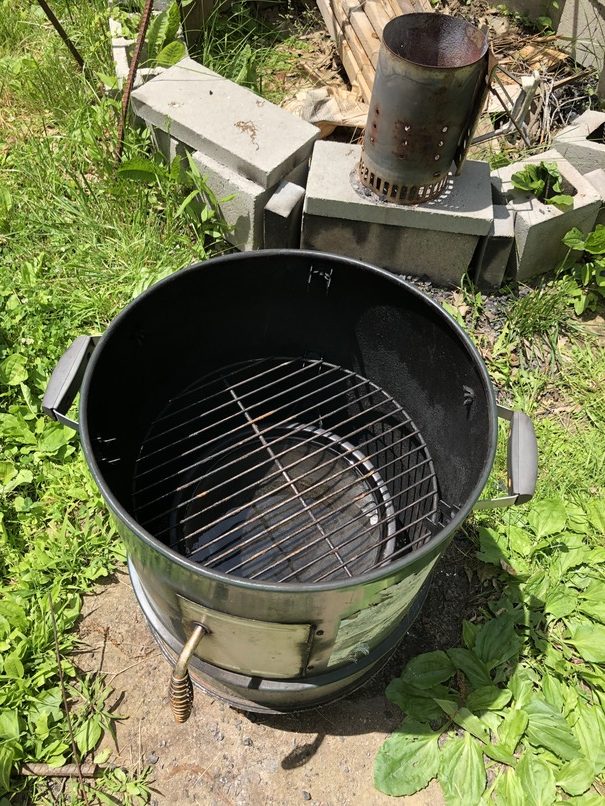
Let’s start with the smoker. Go for a real charcoal smoker, and not electric or gas. Many people prefer electric or gas smokers for the conveience. They will work fine, and you can follow these steps ina similar manner. However, for the best taste, I firmly believe you need real lump charcoal, and not the Kingsford-style briquettes or electric-powered smokers that you toss the smaller chips into. Get down and dirty, and back to nature with big chunks of wood. The food tastes soooo much better. You don’t need a large fancy green egg, or Weber bullet, either, but don’t let me stop you from buying one. I like the cheapest vertical smokers you can find, and the cheaper the better. My requirement is that they have a water bowl for catching the drippings and making ‘smoky gravy’. I am still using the same Brinkmann knockoff I bought ages ago, and it is falling apart from rust and years of use, but I love it.
The chimney
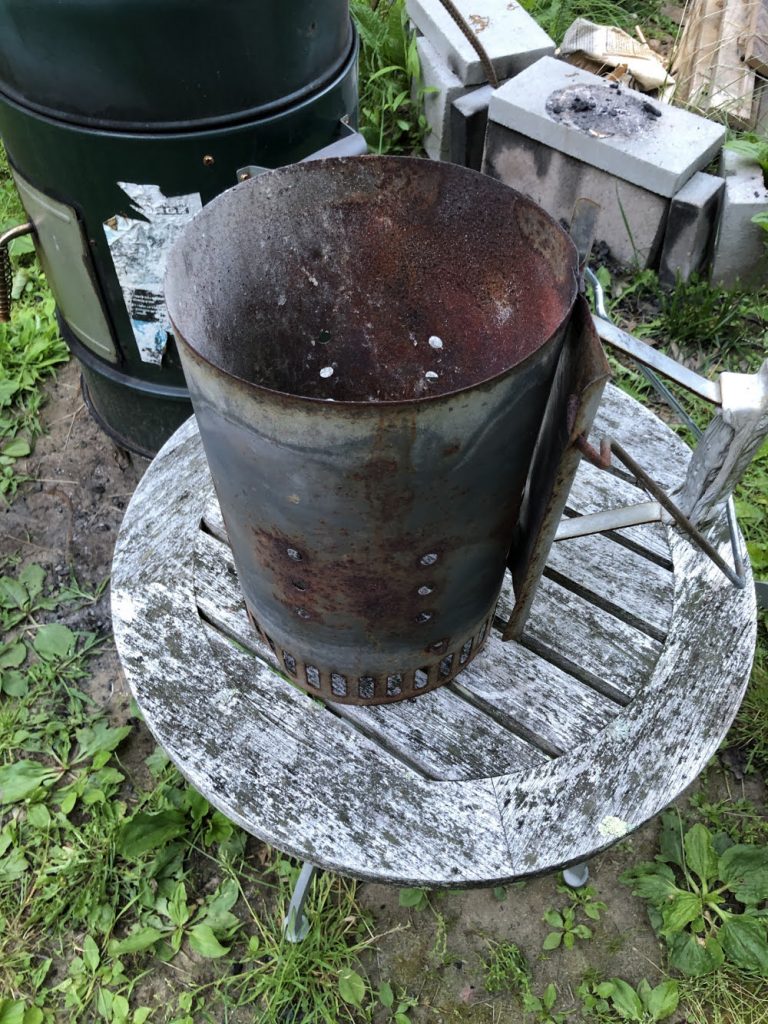
You definitely should not use lighter fluid, as it will a leave bad after taste when smoking food long periods of time, so a starter chimney is a must. I have been using the same one for years, and I did spend a little more for a decent one. Don’t skimp too much here–you can usually find something decent at your local hardware store.
The charcoal
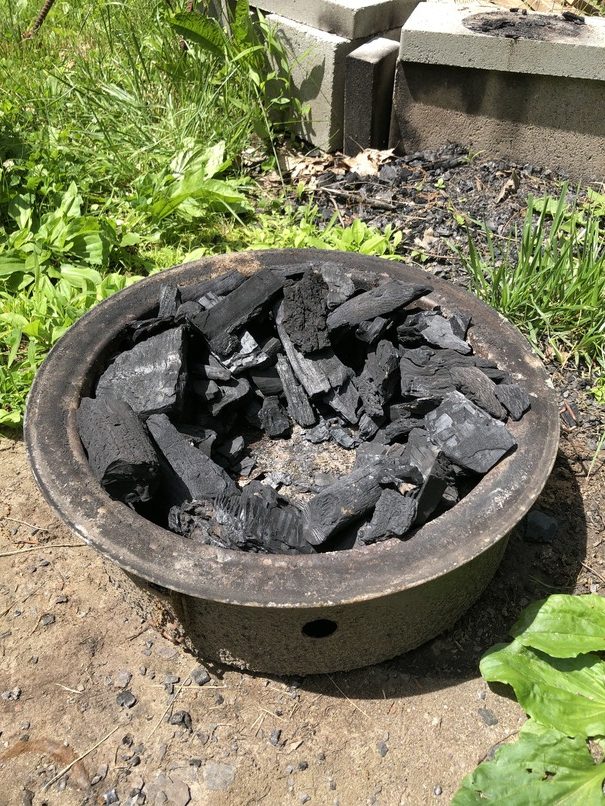
Easy. Get lump charcoal. Don’t mess with briquettes, which are made from sawdust–they give off too much nasty smoke. You can use them if you are in a pinch, and also for shorter cooking times, but go for the lump charcoal… Ask your hardware store for it. It gives off a steady, consistent heat.
The smoker wood
There are many you can choose from, and I have tried a ton. People instantly think hickory when they think of smoked foods like bacon, but just plain hickory by itself is kinda boring. You can use just about any kind of fruit wood. Cherry is nice, but I find it is too pungent for brisket. This is where you must experiment on find your own combo. For me, it has to be the combo of apple, hickory, and white oak. If you do not have access to these types of woods growing around you, you can usually find bags of specific types of smoker wood at your hardware store. We had a giant white oak that the town took down years ago. I saved a bunch of it into thin logs and just take a circular saw to it when I need some chunks. Don’t use chips as they will burn off too fast and you will be making many trips to the smoker to feed it. Ideally you want wood chunks of around 1-3 inches big.

The dry rub
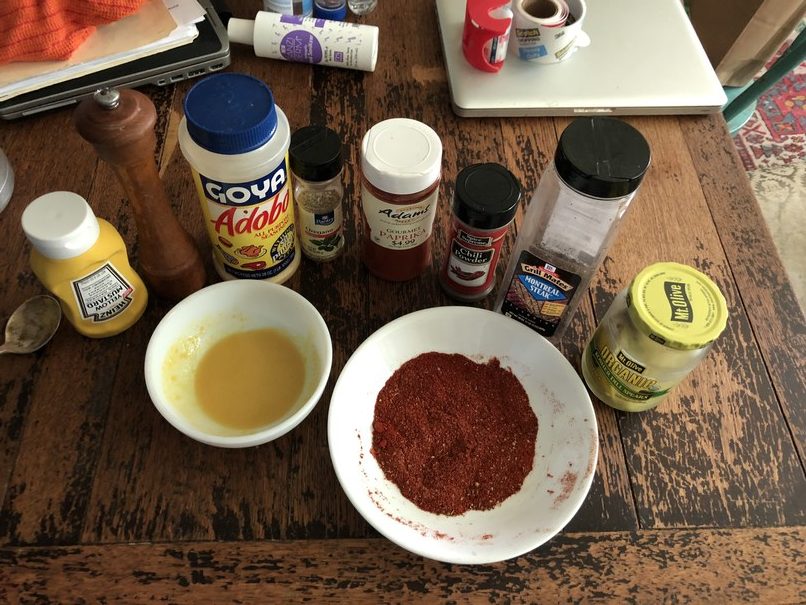
Make your own, or buy some premixed. I am a total DIYer, so I like mixing my own. Always have lots of spices on hand–always. Spice is the spice of life. Here is the combo of what I throw in mine ( except for that hand-sanitizer in back ):

The wet rub
Simple–yellow mustard and leftover pickle juice. Always have these on hand for other recipes, too–always 🙂 I use this simple but amazing combo as the basis of other marinades, and it works wonders.
The brisket
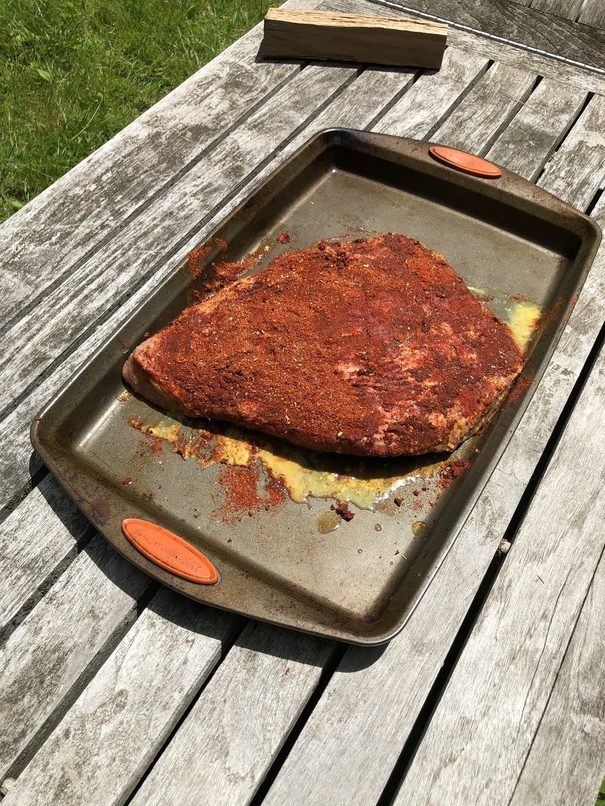
You do not want a corned-beef brisket that has been cured or brined. Buy a plain flat-cut brisket. Many club-style stores like BJ’s and Costco carry brisket in warmer weather. Tell your local butcher you are smoking a brisket, and they should be able to get one for you. I recommend a brisket around 4-5lbs, since it cooks in only around six hours. Plan on around 1.5 hrs per pound.
The smoke
Even if you haven’t cooked a brisket before, you have probably heard the term ‘low and slow.’ You do NOT want a ton of smoke–only tiny wisps of smoke pouring out of the smoker. I achieve this by placing the smoker/fruit wood on the very edges of the coal pan so that they give up the smoke a little at a time. Also, you want nice dry smoker wood. The smoker works by only allowing a small bit of air in, thereby starving the flame and creating the smoke, so you do not need wet wood to create the smoke.
Let’s do this…

Easy Authentic Texas Style Smoked Beef Brisket
Equipment
- vertical charcoal smoker
- lump charcoal
- 2 9×13 aluminum foil trays
- 1 chunk each of apple, hickory, and white oak, about 1-3 inches square
- A thin metal rod for poking the coals and other thingies inside the smoker. I have an old lawn sign stake I use.
Ingredients
- 4-5 lbs flat cut beef brisket
- 2 tbsp plain yellow mustard
- 2 tbsp dill pickle juice
Dry Rub
- 1 teaspoon granulated sugar
- 1 teaspoon dried oregano
- 5 tbsp paprika keep a large container on hand
- 2 tsp Adobo seasoning or course salt
- 1 tsp Montreal Steak Seasoning
- 1 tbsp chili powder
- 1 tsp instant coffee strictly optional, but it lends a deep primal flavor to your brisket–give it a whirl
During the smoke
- 1/2 cup hot apple juice or cider use stove or microwave to heat
Instructions
Prep the smoker and charcoal – Variation of the Minion Method
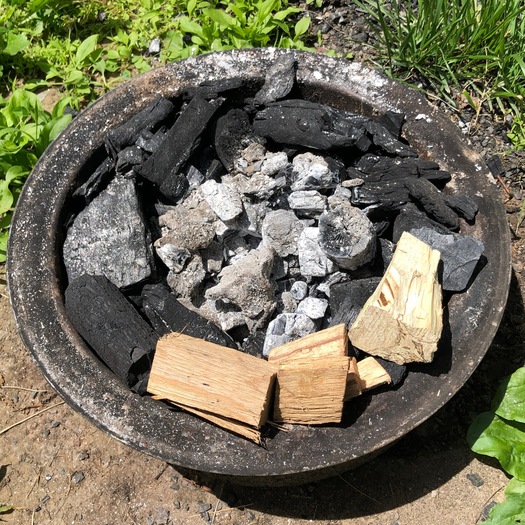
- Line the bottom of your pan with lump charcoal. See if you can find some large pieces to give longer burn times. The Minion method calls for placing hot coals on a layer of unlit charcoal, but I create a large cavity in the center, lining up the charcoal to form a sort of well in the center, like a donut. This is where you will lay the hot coals.

- Fill your chimney with lump charcoal. Get several pieces of newspaper, stuff them in the bottom of the chimney and light the chimney. Make sure you see flames in the bottom of your chimney. This will take around 15 min to get going. The coals are ready when they are mostly white and they have sunk into the chimney a few inches. Leave yourself a wide open space to do this and be extra careful on windy days–no joke.
- Fill the water bowl to the brim with warm water. Try not to spill any. This way, you will not need to refill during the day.
- While the coals are heating in the chimney, assemble the bowl and grate into the smoker and get it ready for when you add the coals. Leave off of the bottom coal pan for now. Go prep your brisket

Dry and wet rub on the brisket
- Add all of the dry ingredients to a bowl and mix well with your fingers–your fingers will turn a lovely shade of red. Your hands are gonna get dirty–it is worth it. Mix the pickle juice and mustard in a separate bowl.
- Pour most of the mustard/pickle juice on the brisket and slather it around with a fork or spoon, FAT SIDE UP. Flip the brisket and get the bottom, and flip back over and make sure it is evenly covered. Then just tip the bowl of the dry rub and start sprinkling evenly over the top of the brisket.
- Continue spreading most of the dry rub over top of the brisket, saving some for the bottom and more to redo the top. Flip and get some on the bottom. Flip back to the fat side up and coat evenly so the entire brisket is coated. You will get best results using your fingers and working it in – a fork or spoon will smear things unevenly.

Load up the smoker
- This is the final step and you are on your way. Take your 3 precious pieces of smoker wood and lay them on the VERY EDGE of the coal pan. Then, take your chimney and CAREFULLY pour the coals into the center well / cavity of the coal pan. You do not want the fruit wood directly on the hot coals. Spread the hot white coals evenly in the center with a coat hanger or thin piece of metal so they are right up against the unlit coals, and ALMOST touching the fruit/smoker wood. You only want a little smoke touching the food for extended durations, or it will come out tasting like a chimney–trust me on this one.
- Place the brisket on the grate in the upper part of the smoker with the water pan already in it. SLOWLY lift and then lower the upper part of the smoker onto the coal pan, being careful not to splash the hot coals. There should be some latches that secure the top part to the base / coal pan. Make sure you latch them closed. Now carefully place the lid on top.
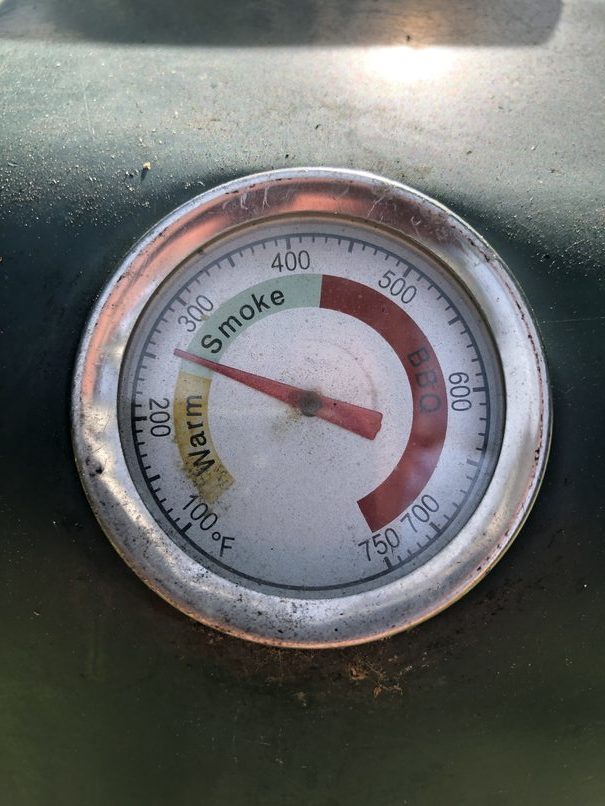
- My smoker did not have an adjustment for air, so I drilled extra holes in the base of mine a long time ago to allow for more air and slightly higher temps. Use the instructions for your smoker for adjusting air flow settings–there many not be any. I'm not too fussy, and go for any temp above 225 degrees. I use the crappy built in thermometer on the side and make sure it is somewhere in the 'smoke' range, and usually need to hit with my metal rod to get it to read properly.
- You should now be able to leave this puppy for about 4 hrs. You will of course want to check it every once in a while. Don't worry if you don't see any smoke at first–resist the temptation to put the fruit wood directly on the coals–let the coals seek out the fruit wood. If you see tons of smoke coming out, you can open the door and check things. Also, don't worry too much if you see a lot of smoke at first; it should die down.
- If you still have billowing smoke after a while, it is possible that the fruit wood fell into the hot coals, and I recommend lifting the top of the smoker off and removing a chunk or two until the smoke dies down, and placing it back in the door of your smoker with tongs when the smoke has diminished. LOW AND SLOW is the motto of pro smokers. That meat will be smoking for a while, so you just want a steady stream of tiny wisps of smoke.

The Texas Crutch
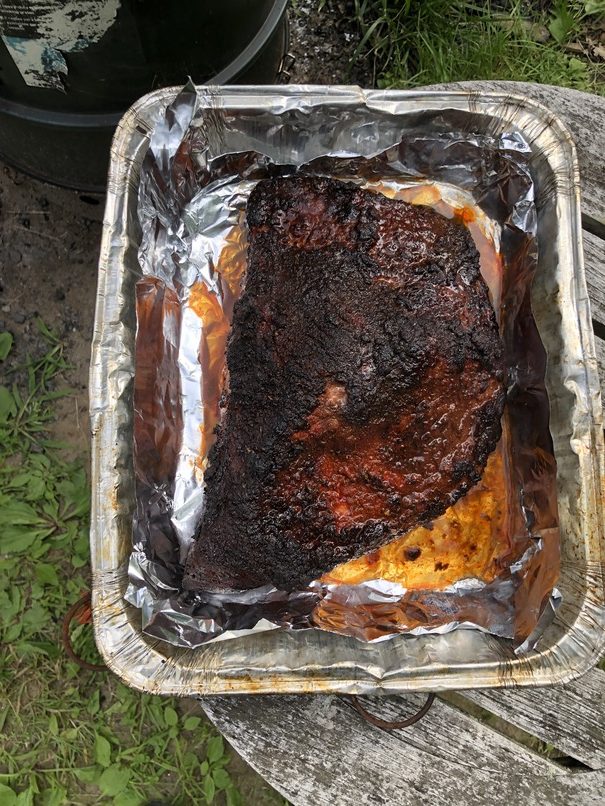
- I usually don't touch the brisket until about four hours, and then I go check the temp. By this time with a meat thermometer. It should be around 155-160 degrees. This is around the temp where it 'stalls' or plateaus and won't get any hotter. This is where many pitmasters will wrap the brisket in paper or foil to concentrate the heat and speed things up. I have found that the taste of the foil gets into the food, so instead of plain foil, I use the thicker 9×13 foil serving trays one on top of the other.
- Do this part quickly to avoid losing much heat. Lift lid, pull the brisket out with a large fork or hook and place in the serving tray. While the lid is off, check your coals and push them around to keep them burning. By this time, the fruit wood will still probably be partially burned and may still be leaning on the sides. You can stir those around a bit also. Since I am covering the brisket, I don't mind kicking up more smoke.
- Pour 1/2 cup of hot apple juice or cider (use a microwave) over the brisket, and cover with the other tray on top. This will braise the brisket as it finishes cooking and make it nice and juicy. You will need to pinch the edges and probably push in the sides to get things to fit back in the smoker. Cover the lid and go on about your business. Almost there.
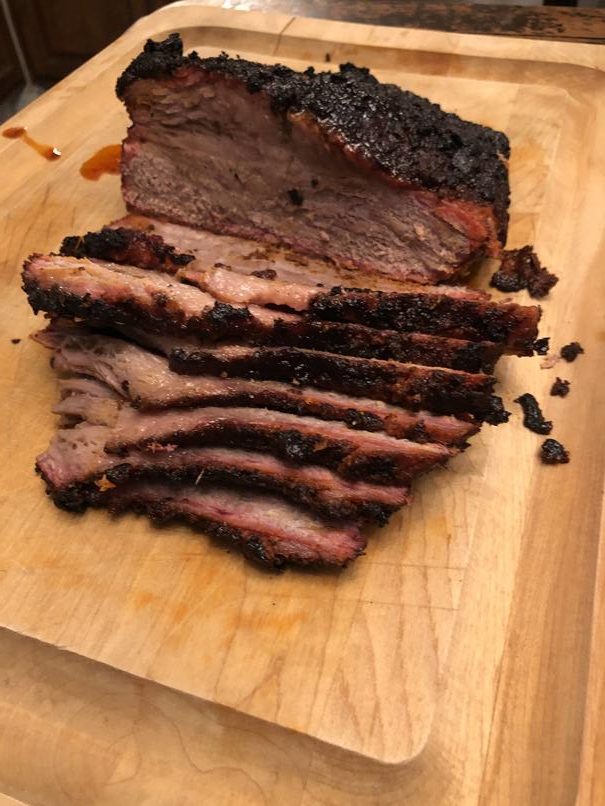
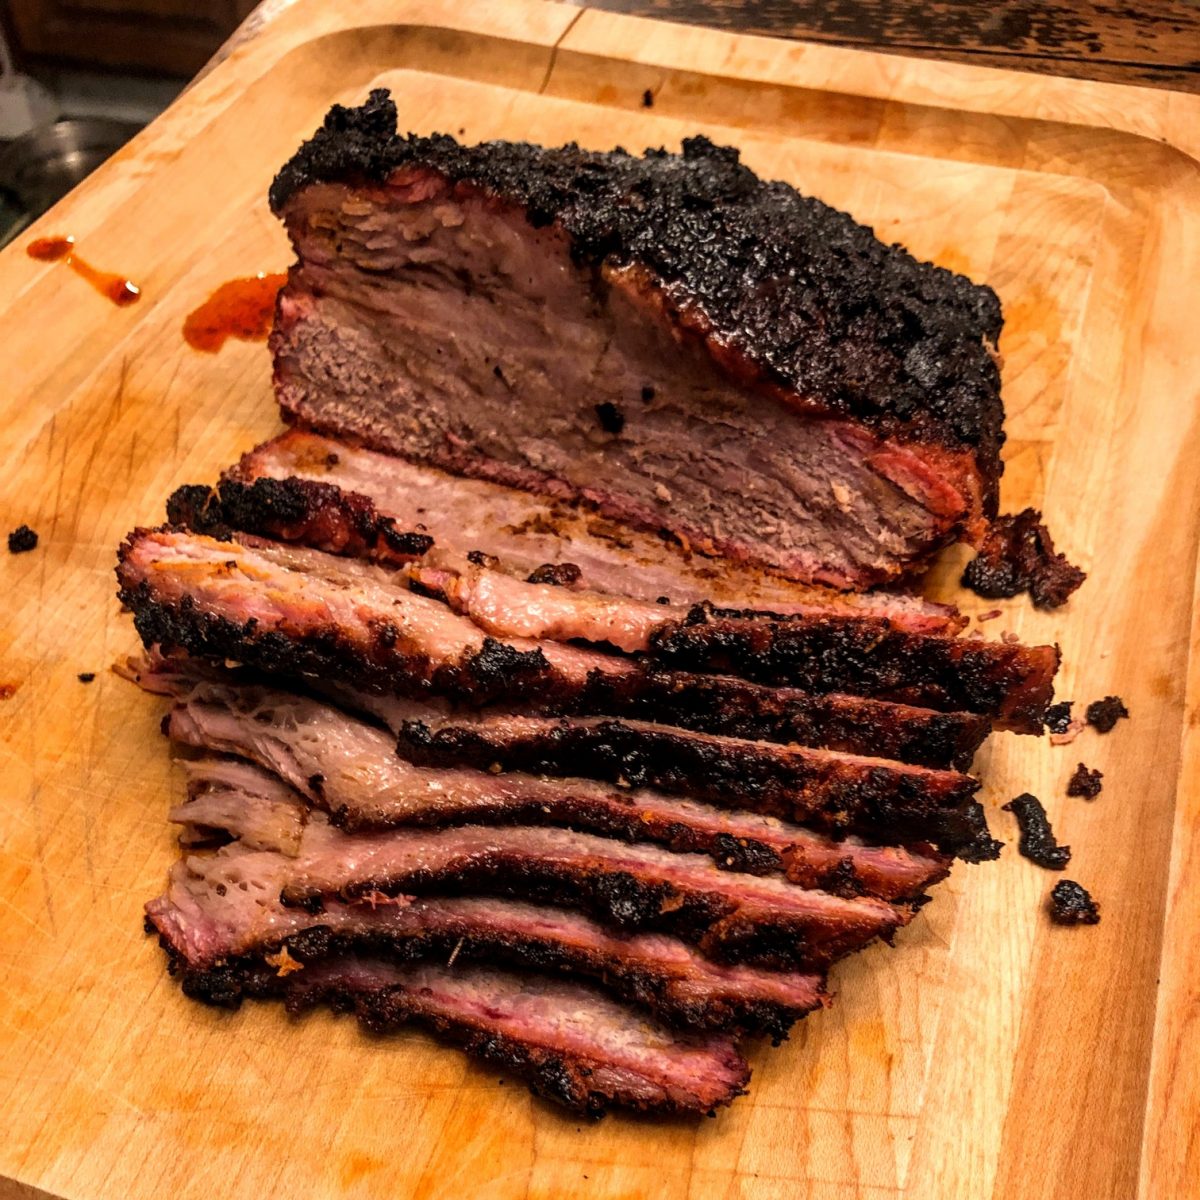
- At about the 5 hr and 30 minute mark, you will want to keep an eye on temps. Here is when folks argue about when to remove the brisket. You want the temps around 190 and above. I like to pull the brisket when it reaches 195 degrees. All you need to do is lightly poke the brisket in a few spots, making sure the temp probe or knife easily slides into it.
- The cool thing about using the foil serving trays is you simply put some oven mitts or welding gloves on, reach in and just pull the whole thing out and let sit on a heatproof surface for at least 15 minutes. I then pull the water pan out and use a cup of the juices to start gravy while the meat is resting. I also tilt the serving tray and pour some of the heavenly juices from the bottom into the gravy.
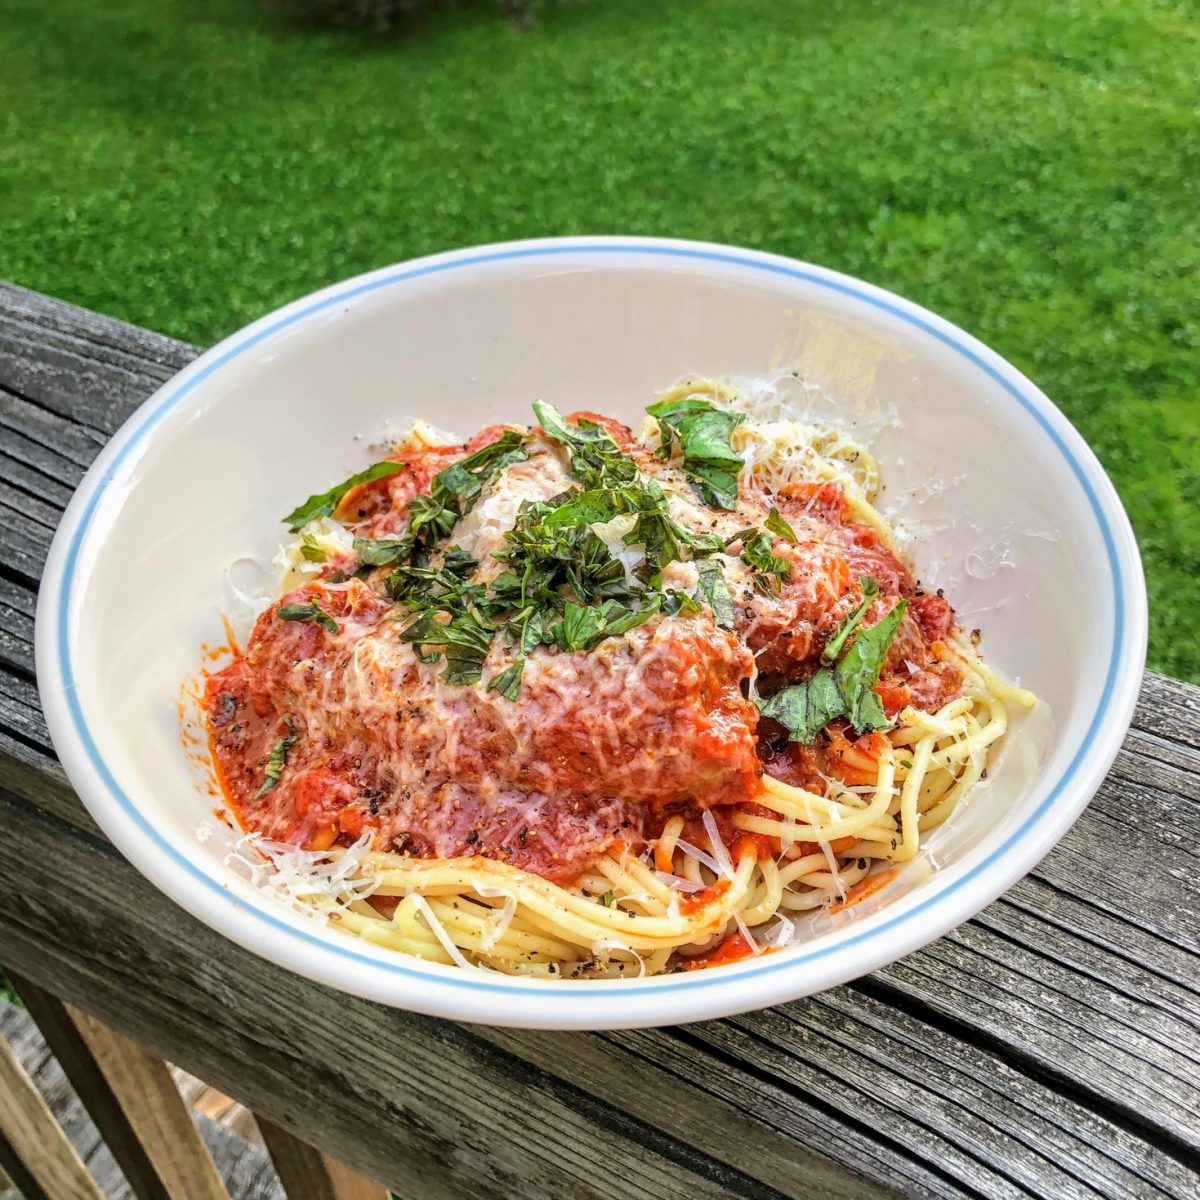
- That's it! You have reached the apex. The smell in your kitchen will be incredible, and you guests will be in awe. Place the brisket on a cutting board, and starting from one end, slice into thin strips crosswise about 1/8 inch thick at a slight angle and serve. Pair this up with all the fixings of bbq, like spicy coleslaw, macaroni and cheese, and your other favorites. You should be proud of your accomplishment. To this day, I always feel amazing having cooked up a delicious brisket for the family, and it is one of the best treats around. Enjoy!
- If you like, making smoky gravy is easy. Add about 1/2 cup of the smoker pan juice to 1 cup beef or chicken broth, any spices you like, and thicken slowly over heat with a slurry of corn starch and water until you get your desired consistency.